Showing posts with label gluten-free. Show all posts

Monday, June 25, 2012

Quinoa Stir Fry with Ginger Peanut Sauce

I posted this picture a couple weeks back in one of my Crate Full of Veggies blogs and was recently reminded I had never gotten the recipe up! So here it is. This seasonal stir fry is one of my favorite ways to use both quinoa and broccoli. And how can you go wrong when ginger peanut sauce is involved? 


Quinoa Stir Fry with Ginger Peanut Sauce
gluten-free
serves 2
prep time: 35 minutes

1/2 cup quinoa
3/4 cup water

1 tbsp oil 
2 cloves garlic, minced
1 medium-sized head of broccoli, chopped
2 carrots, cut into thin strips
1/2 red bell pepper, cut into thin strips

Ginger Peanut Sauce
1/4 cup + 2 tbsp natural peanut butter
1/4 cup water
2 tbsp soy sauce
1 tbsp rice vinegar 
2 garlic cloves, minced
1 tbsp fresh ginger, grated

fresh cilantro or basil
peanuts

Optional: 4-6 ounces extra firm tofu cut into thin slices and prepared in my super secret, super lazy way
or my other lazy way: 1/2 package marinated, ready to eat tofu:
 or really any way you like to prepare tofu.

Rinse the quinoa several times and add it to boiling water. Cook covered for about 20-30 minutes, until water has evaporated and quinoa is light and fluffy. Leave covered, with heat off, for an additional ten minutes.

While quinoa is cooking, get to work on the vegetables. Heat oil in a cast iron skillet or heavy-bottom pan.  Add garlic and saute for 30 seconds, until fragrant. Toss in the remaining vegetables and stir fry until just tender. Do not over cook. They taste a lot better when there is still a snap to them. Remove from heat and set aside.

Mix the ingredients for peanut sauce together. Because I don't like cleaning my blender and I never can fully mix it with a fork, I place all the ingredients in a small mason jar with a lid and shake it for several minutes. I found it to be the easiest, cleanest way for peanut sauce. Once well combined, pour over vegetables and stir to combine.

Serve over cooked quinoa and top fresh cilantro, peanuts and tofu (if desired).
I hope you all had a great summer weekend!


Friday, June 22, 2012

Chocolate Dipped Strawberry Creamsicles


One of the best thing about living in Oregon is the fresh and local strawberries. And then of course there are the hazelnuts. Oh and the coffee. And the mountains. The coast. The gorge. And of course Portland's naked bike ride.  Let me rephrase: there are so many great things about living in Oregon, among which are the fresh, local strawberries. If you have been following me over the past week, you already know that I have an abundance of strawberries and yesterday in between consoling, playing, and feeding my daughter, I de-stemed, washed, and froze bags and bags of berries. In the process I got hungry and paused to whip up a batch of Chocolate Dipped Strawberry Creamsicles. Thanks goodness I did!

You ready for an incredible easy yet fantastic summer dessert?

Chocolate Dipped Strawberry Creamsicles
makes about 10 creamsicles

2 1/2 cups fresh strawberries
1 can full fat coconut milk
1-2 tbsp agave nectar
2 tsp vanilla extract

12 ounces semi-sweet chocolate
3 tbsp coconut oil


In a food processor, blend together strawberries until smooth. Add coconut milk, agave nectar, and vanilla and process until combined. Pour into popsicle molds and place in freezer until frozen all the way through. 

Combine chocolate and coconut oil and melt in a microwave or double boiler.

Prepare a cookie sheet with a silicone mat or waxed paper. Dip frozen creamsicles into melted chocolate and set on cookie sheet. Return to freezer for a couple minutes. Enjoy!


Hope you all have a wonderful summer weekend! Get excited for next week; The Sweet Life is having it's very first giveaway!


Thursday, June 14, 2012

no bake oatmeal raisin cookie bites

The other day I had walnuts soaking overnight for a raw "tuna" salad but the next morning I just wasn't in the mood. I wanted something sweet. I scanned through my pantry, trying to figure out what ingredients I could throw together to get my sweet fix and ta da! the No Bake Cookie Bites were born.

No Bake Oatmeal Raisin Cookie Bites
gluten-free, sugar-free, and soy-free
makes 12

1 cup soaked walnuts
1/2 cup dates
1/2 cup oats, 1/2 ground together
1/4 tsp salt
1/2 tsp cinnamon
1 tsp vanilla
2 tbsp raisins
In a food processor mix together dates, walnuts, salt, cinnamon, and vanilla until it is a fairly smooth paste. Add 1/4 cup oats and blend into the mixture. Remove dough from food processor and place in a medium sized bowl. Fold in the remaining oats and raisins. 

Scoop dough into 2 Tbsp sized pieces and roll into balls. Allow cookie bites to set up in the refrigerator for an hour. Store in fridge.

Enjoy!

I'll be experimenting with a lot of flavor combinations. These cookies are so easy, good, and healthy! Next up...Peanut Butter Cookie Bites. 

What is your favorite kind of cookie?

Tuesday, June 5, 2012

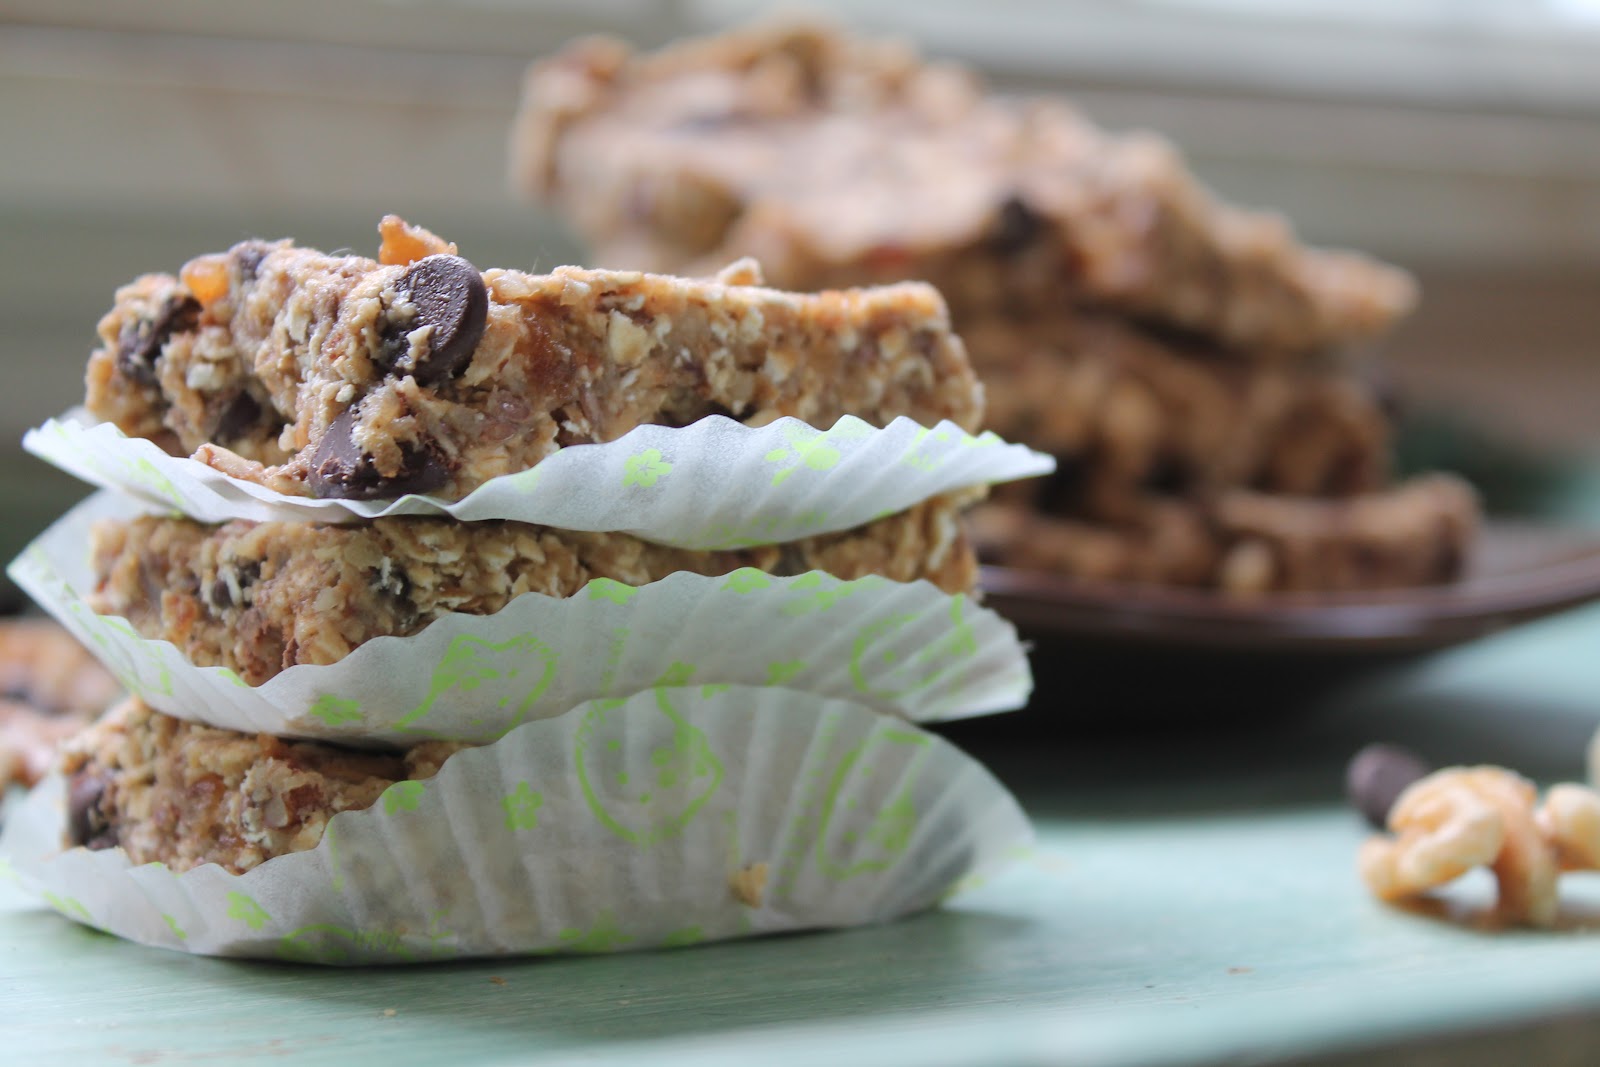
Oatmeal Chocolate Chip Breakfast Cookie

These (almost) raw breakfast bars are loaded with good stuff. Filled with protein and fiber and chocolate chips, it is the perfect way to start the day.

Oatmeal Chocolate Chip Breakfast Bars
yield: 12 bars
gluten-free, sugar-free, soy-free, (almost) raw

1 1/2 cups walnuts, soaked overnight, drained and rinsed
1 1/2 cups dates, pitted
1/2 tsp salt
2 cups oats
3 tbsp raisins
2 tbsp flax seeds
1/4 cup chocolate chips
1/4 cup pecans, chopped
Lightly spay an 8x8 baking dish and set aside.

Mix together dates, walnuts, and salt and in a food processor until fairly smooth (some texture is fine). Add 1/2 cup oats and blend until oats are broken up.

Remove dough from food processor and place in medium bowl. Add the rest of the oats and all remaining ingredients. Stir together until everything is well combined.

Press into the bottom of the baking dish. Let set up in refrigerator at least an hour before slicing. Store in refrigerator and enjoy as breakfast or midday snack throughout the week.
 What's your favorite breakfast food?

Monday, June 4, 2012

Coconut Lime Cream Cake

Sweet Summer, how I love you! And this summer is going to be a good one. Wanna know why? Because it hasn't even started and I'm already enjoying a coconut lime cream cake. And now you can too. Get excited about this delicious, creamy, and refreshing dessert because it's so easy, so quick, and one that everyone can enjoy.

Coconut Lime Cream Cake
raw, gluten-free, soy-free, refined sugar-free
yields: 4 small tarts or cakes
prep time: 20 minutes + 2 hours freezer time

Crust
1 cup unsalted pistachios
2 Tbsp Agave Nectar
pinch of salt

Filling
1 can coconut milk, chilled overnight.
1 avocado
6 Tbsp Agave Nectar
1/3 cup lime juice
1 tsp coconut extract
zest of 1lime

Topping
1 can coconut milk, chilled overnight


Lightly spray four small tart shells or an individual cake pan.
Side note: This is what I'm talking about when I say individual cake or brownie pan.
I use this pan all the time (remember the raw chocolate cheesecake and orange creamsicle) and
it has become one of my favorite ways to make individual servings. But if you don't have small tart shells or a pan similar to this, a muffin tin works great for individual servings.

Okay, back to recipe
Mix the crust ingredients (pistachios, agave, and salt) together in a food processor until pistachios are ground up and hold together. Divide evenly between the four tart, cake, or muffin pans. Press pistachios into the bottom of the pans and set aside to make a filling.

In a food processor combine the rest of the ingredients. You only want to use the fatty, cream part of the coconut milk which, if chilled the night before, will be nicely separated to the top of the can and will scoop out easily.  Mix ingredients until well combined. Scoop batter into the tart shells almost to the top and place in freezer.

To make the topping use your second can of coconut milk the same way as the first, scooping out only the solids. Blend with hand mixture until it resembles whipped cream. You may want to sweeten the coconut whipped cream a little in which case you can add about 1 tbsp agave nectar.

Pull cream cakes out of the freezer and create a smooth top with coconut whipped cream. Place back in freezer and allow to set up for 2 hours.

When ready to serve remove from the freezer, take cream cakes out of pans (you may have to run a hot knife around the edges and give it a few thumps upside down) and allow to thaw 15-20 minutes before eating.
Enjoy!

Thursday, May 31, 2012

Cuban Tempeh

This is a meal my husband and I brought back with us from a small restaurant cafe in western Michigan. It traveled over 3000 miles to find it's way on our dinner table. And after traveling all those miles and over all that time, the dish has inevitably changed, but the inspiration behind it remains and several times a month we sit down to this, enjoying our meal of tempeh and nostalgia.

Cuban Tempeh
gluten-free, yield: 2
preparation: 45 minutes

1 package tempeh, cut in thin strips
1 cup vegetable broth
2 tsp chili powder
1/2 tsp coriander
1/2 tsp cumin
juice of 1 lime

1 cup brown basmati (or any other kind of) rice, cooked

1 can or 3/4 cup dried (soaked and cooked) black beans
1 tbsp cumin
pinch of salt

2 corn tortillas
your assorted toppings (lettuce, green onions, salsa, avocado, etc)
1. Marinate the tempeh in vegetable broth, chili powder, coriander, cumin, and lime juice for at least 1 hour.

2. While tempeh is marinating, cook the rice according to directions. Once rice reaches a boil, turn down to a simmer, set aside and prepare the rest of the meal.

2. Heat up a cast iron skillet or heavy bottom pan. Once hot, pour in marinated tempeh (with liquid). Bring liquid to boil then turn down heat to a simmer. The broth will evaporate as it soak into the tempeh. Cook until all the broth is gone and the tempeh has a chance to brown on both sides.

3. Meanwhile heat up the black beans. Stir in cumin and salt. With a masher, smash the beans until no whole beans exist. Remove from heat and set aside.

Okay, you did it! Now it's time to assemble....
Place a corn tortillas on the bottom of the plate. Top with rice, black beans, and tempeh in that order. Then top with your favorite toppings.

Enjoy!


Thursday, May 24, 2012

Tempeh Tuna Salad

A true vegan classic, tempeh tuna will always satisfy and delight. Full of protein and nutrients this salad became a staple of my pregnant diet. Enjoy this salad on a bed of greens or in between toast.

Tempeh Tuna Salad
gluten-free
serves 2-3

1 package tempeh
1/4 cup onions, diced
1/4 cup celery, diced
2 tbsp dill, chopped
1 tbsp vegenaise
2 tsp spicy mustard
2 tsp lemon juice
1 pinch cayenne
salt and pepper to taste

Boil the tempeh in a medium-sized pot for twenty minutes, until tender. Drain the water and let tempeh cool. Meanwhile chopped the vegetables and dill.
Once tempeh has cooled smash it with a fork, your hands, or any mashing utensil you have in your kitchen. Smash it until it's mostly broken apart. Mix in all other ingredients and refrigerate until ready to use.

Sunday, May 20, 2012

Spinach Strawberry Salad

Summer is upon us! Well almost. I love hot late spring evenings accompanied by cool salads. This is a great dinner salad, sweet strawberries and roasted hazelnuts over a bed of crisp spinach and topped with red wine vinaigrette. Yum!

Spinach Strawberry Salad
Yield: 2 large dinner salads

1 bunch spinach
1/2 avocado, sliced
about 10 strawberries, sliced
2 chives, diced
1/4 cup roasted and halved hazelnuts
2 Tbsp sunflower seeds

Wash spinach and toss ingredients together.  

Red Wine Vinegarette

2 Tbsp red wine vinegar
1 Tbsp lemon juice
1 Tsp agave nectar
1/2 tsp salt
freshly ground pepper
1/4 cup olive oil

Put vinegar, lemon juice, agave, salt and pepper in a food processor and combine. With motor running, slowly add oil. Mix until incorporated.

Drizzle on salad. Enjoy!

Tuesday, May 15, 2012

Orange Creamsicle

Remember these? Creamy and citrus-y on a stick. It's heating up in Portland. We have our kiddie pool set up in the backyard for the dog, the sound of lawn mowers wafting through our open windows, and now orange creamsicles awaiting our consumption in the freezer.

Orange Creamsicles
yield: about 12 popsicles

1 container orange concentrate
2 cans coconut milk
2 tsp vanilla
2-3 tbsp agave nectar

Blend the orange concentrate in a blender or food processor until smooth. Add the remaining ingredients and blend until well combined. Pour into a popsicle tray, dixie cups or really any kind of mold. I made a couple popcicles and poured the rest into an single serving brownie tray. Let set up in the freezer and enjoy!

Sunday, May 13, 2012

Lemon Pepper Quinoa Pasta with Blackened Tofu

 gluten-free & vegan
This Lemon Pepper Pasta is a great meal for a warm day. The quinoa pasta is a light alternative to wheat pasta and the crisp asparagus and lemony tang welcome in the fast arriving summer.

Lemon Pepper Quinoa Pasta with Blackened Tofu
yield: 2
1 1/2 cups quinoa pasta
2 cloves garlic, minced
1 medium leek
1/2 bunch asparagus
4-6 sun-dried tomatoes
about 10 kalamata olives
2 Tbsp lemon juice
2 Tbsp olive oil + 1 Tbsp for skillet
pinch of cayenne pepper (optional)
1 Tbsp chopped basil
salt and pepper

6 ounces extra firm tofu, cut into four slabs
1-2 tsp veggie broth paste (I use Better than Bullion) or 1 cup veggie broth
Cook the pasta according to package directions. Meanwhile heat up 1 Tbsp oil in a large skillet over medium heat. Add garlic and leeks and let cook five minutes, stirring often. Add chopped asparagus (stems removed), chopped sun-dried tomatoes, and halved kalamata olives. Continue cooking for another couple minutes, stirring occasionally until asparagus is heated up, but still has a slight crunch. Remove from heat. Mix the cooked noodles into skillet. Add lemon juice, olive oil, cayenne pepper, basil, salt, and pepper. Set aside.

Blackened Tofu
Okay this is my super-easy, super-lazy, and super-secret tofu technique.
1. Heat up a second skillet over medium-high heat
2. Brush both sides of each tofu slab with a very small (1-2 tsp total) amount of veggie stock paste
3. Place on hot skillet and grill 2-3 minutes on each side.

If you don't have or can't find veggie stock paste you can marinate the tofu in veggie broth for at least 30 minutes before grilling.

Plate up, sprinkle with ground peppercorns and enjoy!


Chocolate Peppermint Mousse

sugar-free, soy-free, gluten-free

Look good? It is!
Get the recipe here at The Sweetest Vegan who graciously let me be a guest blogger on her fantastic website.

Tuesday, May 8, 2012

Raw Coconut Almond Truffles

 raw, gluten-free, soy-free, sugar-free, vegan

These super easy truffles will satisfy that late night chocolate craving without the sugar and empty calories of other desserts. And they freeze well, so make only a couple truffles and freeze the batter for later midnight chocolate craving.
Raw Coconut Almond Truffles
1 cup dates
1/2 cup walnuts
1/2 cup almonds
1/2 + 2 Tbsp cup raw cocoa powder
1/2 cup shredded unsweetened coconut 
1/4 cup maple syrup
1 tsp vanilla extract
1 tsp almond extract
1/2 tsp salt
Extra coconut, cocoa powder, or nuts for finishing

In a food processor blend together dates, walnuts, and almonds until it forms a crumble-paste. If it is too thick, add a little water, but only enough for it to come together. It shouldn't be totally smooth; some nutty pieces are desirable. Add the cocoa powder and blend until mostly incorporated. Remove the nut mixture from food processor and place in a large bowl. Fold in the remaining ingredients by hand.

Now it's time to truffle. If the "dough" is too sticky at this point, place in the freezer for 30 minutes until it rolls easily into balls. Measure the truffle mixture out with 1 heaping tablespoon each. Roll into balls and then toss in your desired topping. 
While these could be eaten right away, the truffles are best when cold. For best results place truffles in freezer and allow to harden (at least 1 hours). Store the remaining in freezer and pull out 10 minutes before serving.

What's your favorite midnight treat?

Monday, May 7, 2012

frushi (fruit sushi)

 What is better than tropical fruit and minty coconut flavors on a hot day? 
That's right, we had frushi for dinner! Typically I think of this as more of an after-dinner sweet, or summer time snack, but I had a very specific craving tonight and thus I offer you my fruit sushi.
Frushi
Gluten-free, soy-free, sugar-free, vegan

Coconut Rice
1 cups sushi rice
1 1/2 cup water
1 cup coconut milk
2 Tbsp maple syrup
1 tsp vanilla
1 pinch salt
 Prepare the sushi rice. Rinse the rice 4 or 5 times until the water runs clean. Once clear, drain water and add 1 1/2 cups cold, fresh water to rice. Allow to soak for 30 minutes. Place on stove over high heat and bring to boil. Reduce heat to simmer and cook 20 minutes.
When water has evaporated and the rice is done, turn heat up to medium and add the remaining ingredients.
Stirring often, mix until the coconut milk is soaked into the rice, about ten minutes. Spread rice onto a plate and allow to cool. 

Once rice is at room temperature, scoop the rice into heaping tablespoons and shape into squares or circles. Place back into refrigerator and let rice set up. Meanwhile thinly slice fruit.
 mango
kiwi
watermelon
pineapple
or any other fruit of your choice

Assemble frushi however your heart desires.
Once frushi is assembled refrigerate and make the coconut dipping sauce.

 Coconut Dipping Sauce
1/2 cup coconut milk (or the remaining of your can)
2 tsp maple syrup
1 tbsp finely minced mint

Mix together. Refrigerate until ready to use.

Enjoy!

 What's your favorite food on a hot (almost) summer day?

Sunday, May 6, 2012

Raw Chocolate Hazelnut Cheesecake

That's right friends. And it's as good as it looks.

So far the biggest benefit of my soy/gluten freedom month has been the forcing of creativity and innovation. I have to admit, I used to have a sort of prejudice against raw desserts disbelieving in their potential goodness. Oh was I wrong. This is one of my favorite desserts I have ever made. Ever. The chocolate hazelnut cheesecake is so rich and creamy and pure. But wait there's more, it's also healthy!


Raw Chocolate Hazelnut Cheesecake
gluten-free, soy-free, sugar-free, raw, vegan

Crust
1 cup hazelnut meal
1/4 cup + 2 Tbsp raw cocoa powder
3 Tbsp maple syrup
1 tsp vanilla
1 pinch sea salt

The best pan to use for this recipe would be a Flexi-pan or other type of silicone mold. Otherwise a spring form pan works great. If you're very brave and don't have a Flexi-pan but want individual cheesecakes, use a muffin pan, lightly oiled. It will take a little tlc to get the cheesecakes out, but you can do it! This recipe would fill a 9" spring form pan or about 12 individual molds.

Blend all ingredients together in a food processor until it starts to come together. Press the crust into the bottom of desired pan, about 1/4 inch thick.

Set aside while you making the filling.
 The Filling
2 cups raw cashews, soaked overnight and rinsed
1/4 cup + 2 Tbsp hazelnut butter (peanut butter works too)
1/2 cup coconut oil, melted
1/2 cup maple syrup
1/2 cup cocoa powder
1/2 cup water
1/2 tsp salt

In a food processor or mixer blend together cashews, maple syrup, water, and salt. Mix until totally smooth, scraping down the sides of the processor as necessary. Add cocoa powder, hazelnut butter and coconut oil to cashew mixture and blend all together, scraping down again, until mixture is uniformly combine.

Spoon or pipe filling on top of crusts. Stick cheesecake in the freezer until solid all the way through (at least 2 hours for individual cheesecakes, 4 for large cheesecake).
Once frozen remove cheesecake from pan. If using silicone mold, they will easily pop out. If you have a muffin tin, run a sharp, hot knife around the edges of each cheesecake, flip tin upside down and give it a few good whacks again the counter. They could start to slowly side out at this point. Be patient, gravity is on your side. If a few minutes have past and the cheesecakes are still refusing to drop, use a lighter to heat the bottom of the tin briefly; the heat will help release the cake.

Place cakes in the refrigerator and make the chocolate sauce.


 Chocolate Sauce
1/3 cup coconut oil, melted
1 tsp vanilla
1/4 cup maple syrup
1/4 cup cocoa powder

Mix ingredients together with fork. Scoop a little onto cold cheesecake. Place back in fridge and let sauce harden.

Top with hazelnuts. Serve cold


Friday, May 4, 2012

Chocolate Peanut Butter Banana Milkshake...

for breakfast? okay!

This shake is healthy enough for breakfast and good enough for dessert! Check it out!

Chocolate, Peanut Butter, and Banana Shake
Soy-Free, Gluten-Free, Sugar-Free, and Vegan
2 frozen bananas
1 cup milk (I used hazelnut milk but soy, oat, or almond would work great too)
2 Tbsp cocoa powder
1 1/2 Tbsp peanut butter
1 Tbsp brown rice syrup
Blend together in mixer or food processor until smooth.
Enjoy!

When I was pregnant I would add soy protein powder to my morning shakes for some extra nutrition. Currently I'm off soy but it would be  great addition for anyone who needs a protein boost.


ShareThis