Showing posts with label snacks. Show all posts

Thursday, June 14, 2012

no bake oatmeal raisin cookie bites

The other day I had walnuts soaking overnight for a raw "tuna" salad but the next morning I just wasn't in the mood. I wanted something sweet. I scanned through my pantry, trying to figure out what ingredients I could throw together to get my sweet fix and ta da! the No Bake Cookie Bites were born.

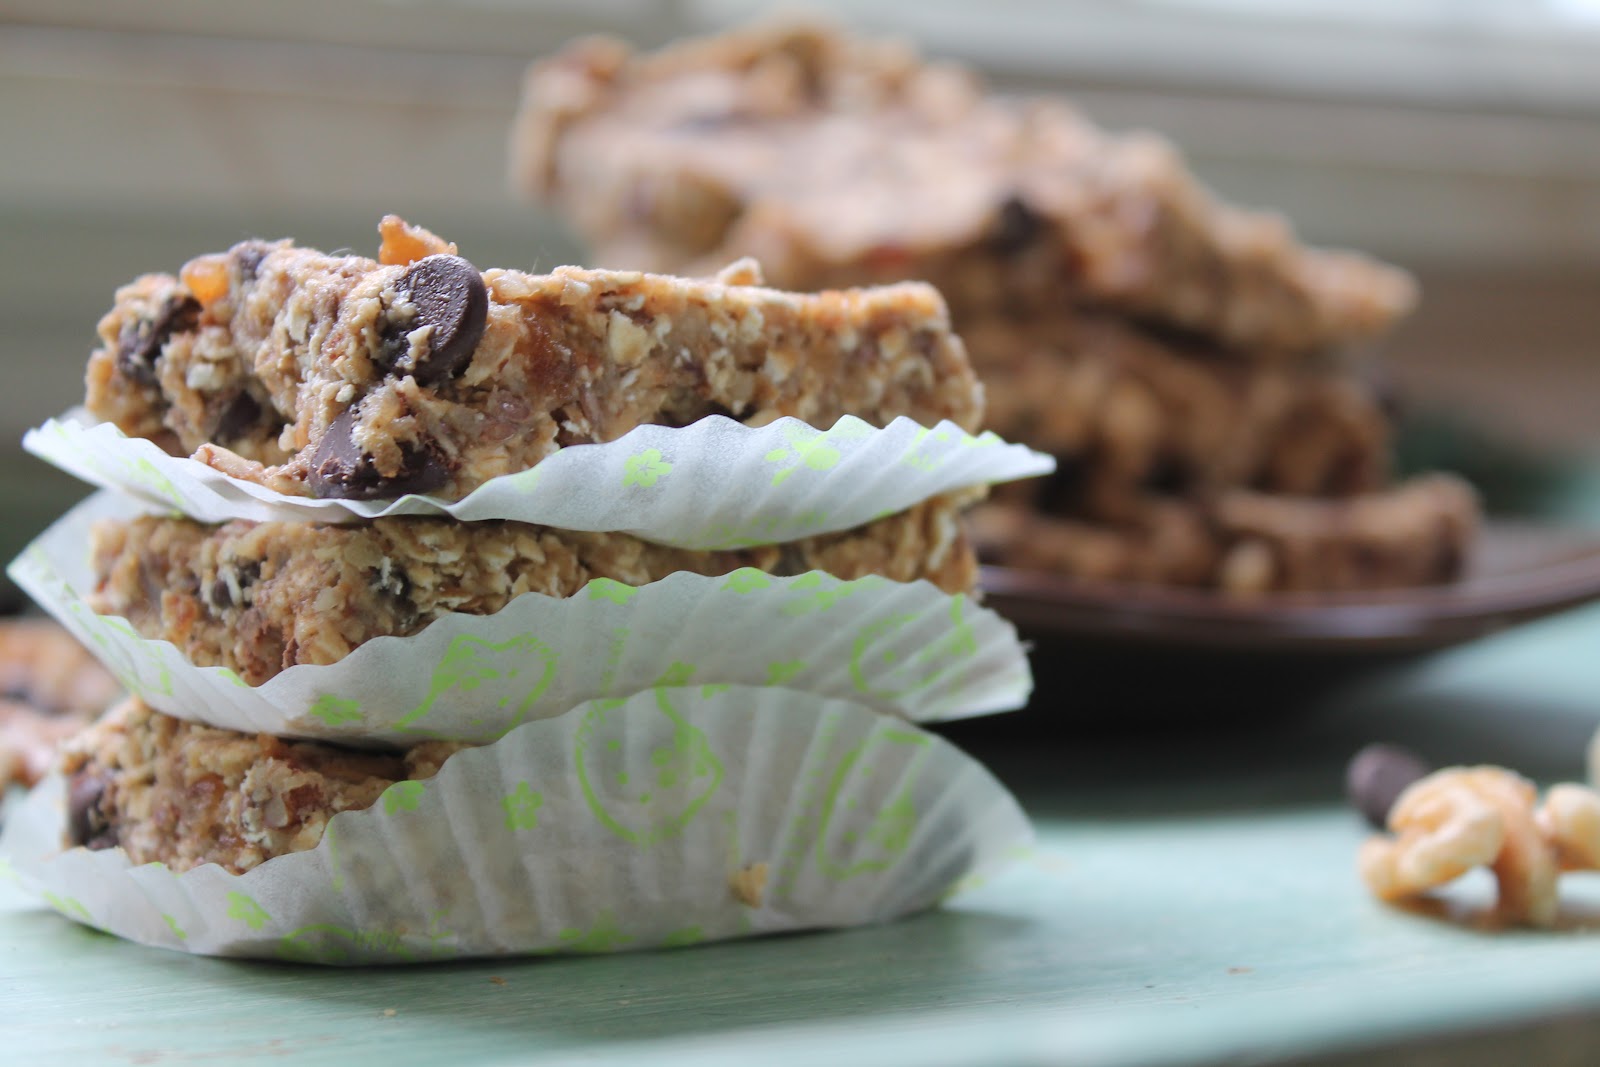
No Bake Oatmeal Raisin Cookie Bites
gluten-free, sugar-free, and soy-free
makes 12

1 cup soaked walnuts
1/2 cup dates
1/2 cup oats, 1/2 ground together
1/4 tsp salt
1/2 tsp cinnamon
1 tsp vanilla
2 tbsp raisins
In a food processor mix together dates, walnuts, salt, cinnamon, and vanilla until it is a fairly smooth paste. Add 1/4 cup oats and blend into the mixture. Remove dough from food processor and place in a medium sized bowl. Fold in the remaining oats and raisins. 

Scoop dough into 2 Tbsp sized pieces and roll into balls. Allow cookie bites to set up in the refrigerator for an hour. Store in fridge.

Enjoy!

I'll be experimenting with a lot of flavor combinations. These cookies are so easy, good, and healthy! Next up...Peanut Butter Cookie Bites. 

What is your favorite kind of cookie?

Tuesday, June 5, 2012

Oatmeal Chocolate Chip Breakfast Cookie

These (almost) raw breakfast bars are loaded with good stuff. Filled with protein and fiber and chocolate chips, it is the perfect way to start the day.

Oatmeal Chocolate Chip Breakfast Bars
yield: 12 bars
gluten-free, sugar-free, soy-free, (almost) raw

1 1/2 cups walnuts, soaked overnight, drained and rinsed
1 1/2 cups dates, pitted
1/2 tsp salt
2 cups oats
3 tbsp raisins
2 tbsp flax seeds
1/4 cup chocolate chips
1/4 cup pecans, chopped
Lightly spay an 8x8 baking dish and set aside.

Mix together dates, walnuts, and salt and in a food processor until fairly smooth (some texture is fine). Add 1/2 cup oats and blend until oats are broken up.

Remove dough from food processor and place in medium bowl. Add the rest of the oats and all remaining ingredients. Stir together until everything is well combined.

Press into the bottom of the baking dish. Let set up in refrigerator at least an hour before slicing. Store in refrigerator and enjoy as breakfast or midday snack throughout the week.
 What's your favorite breakfast food?

Monday, May 7, 2012

frushi (fruit sushi)

 What is better than tropical fruit and minty coconut flavors on a hot day? 
That's right, we had frushi for dinner! Typically I think of this as more of an after-dinner sweet, or summer time snack, but I had a very specific craving tonight and thus I offer you my fruit sushi.
Frushi
Gluten-free, soy-free, sugar-free, vegan

Coconut Rice
1 cups sushi rice
1 1/2 cup water
1 cup coconut milk
2 Tbsp maple syrup
1 tsp vanilla
1 pinch salt
 Prepare the sushi rice. Rinse the rice 4 or 5 times until the water runs clean. Once clear, drain water and add 1 1/2 cups cold, fresh water to rice. Allow to soak for 30 minutes. Place on stove over high heat and bring to boil. Reduce heat to simmer and cook 20 minutes.
When water has evaporated and the rice is done, turn heat up to medium and add the remaining ingredients.
Stirring often, mix until the coconut milk is soaked into the rice, about ten minutes. Spread rice onto a plate and allow to cool. 

Once rice is at room temperature, scoop the rice into heaping tablespoons and shape into squares or circles. Place back into refrigerator and let rice set up. Meanwhile thinly slice fruit.
 mango
kiwi
watermelon
pineapple
or any other fruit of your choice

Assemble frushi however your heart desires.
Once frushi is assembled refrigerate and make the coconut dipping sauce.

 Coconut Dipping Sauce
1/2 cup coconut milk (or the remaining of your can)
2 tsp maple syrup
1 tbsp finely minced mint

Mix together. Refrigerate until ready to use.

Enjoy!

 What's your favorite food on a hot (almost) summer day?

Thursday, May 3, 2012

Pepperjack Cashew Cheese

Oh my my, I love cashew cheese. There are a lot of store-bought, processed vegan cheeses out there, and some of them are quite good but few are meant to be eaten without melting first. This Pepperjack recipes is inspired from The Complete Guide to Vegan Food Substitutions, which I talked about here.
This recipe makes a lot of cheese and could easily be cut in half.

Spicy Pepperjack Cashew Cheese
Soy-free, Gluten-free, Vegan
1 Tbsp agar powder
3 cups water
2 cups raw cashews, soaked
1/4 cup lemon juice
1/4 cup nutritional yeast
2 tsp sea salt
1/2 tsp onion powder
1/2 tsp garlic powder
1/2 tsp red pepper flakes
Prepare a loaf pan (9x5 or so) by lightly oiling the bottom and sides.

Blend the cashews in (ideally a Vita-mix) mixer or food processor until totally smooth. Add the lemon juice, nutritional yeast, salt, onion and garlic powders, and red pepper flakes and mix together until smooth.
Meanwhile measure 1 Tbsp of agar and mix with 3 cups of water. Bring to a full boil and then boil for five minutes, whisking often.

Pour the cashew mixture into agar/water pot and stir together until well combined and smooth. The cheese should come together at this point and clear the sides of the pot.

Immediately fill your prepared loaf pan with the cheese and smooth over the top.
Refrigerate until hard. When ready gently pull cheese away from the sides and flip it out. Cut with a serrated knife. Store in an airtight container in refrigerator for up to one week. For longer storage tightly wrap the cheese in plastic wrap several times and store in freezer.
Enjoy with crackers or fruit.

Monday, April 30, 2012

Salted Caramel Corn

 gluten-free, soy-free, vegan

12 cups popped popcorn (about 1/2 cup kernels)

1 cup packed brown sugar
1/2 cup brown rice syrup
1/3 cup non-hydrogenated margarine (I used soy free Earth Balance)
1/2 tsp salt
1/2 tsp baking soda
1 tsp vanilla

I only recently discovered how easy it is to make popcorn with just a stove and a pot. Upon this discovery my mind started racing with all the wonderful  flavors I could make. Naturally salted caramel was the first on my list.

So if you're like me and are unlearned in the ways of air popping popcorn, fear not! It's incredible fast and easy.  Place the kernels in a large pot over medium high heat with tight fitting lid. For 1/2 cup kernels, I used a 6 qt pot and it just fit. Keep the pot moving around the burner to avoid burning the kernel, hold down the lid, and wait for the kernels to pop. Remove from heat as the popping slows down, keeping the lid on for any remaining kernels to finish.


Pour the popcorn in a large bowl and set aside while making the caramel sauce.

Preheat the oven to 250 degrees F and lightly oil two baking sheets.
In a medium sized pot combine sugar, brown rice syrup, and margarine over medium heat.


Stir together and bring to a boil. Let boil for five minutes, stirring once.


Remove from heat and add baking soda, salt, and vanilla. Immediately pour over the popcorn slowly while mixing it in with the other hand. Once well combined spread out into single layer onto prepared baking sheets. Sprinkle with a couple pinches of good sea salt and bake for 45 minutes, stirring every 15 minutes. Remove from oven and stir once more. Let sit for 10 minutes and enjoy!


When completely cool store in an airtight container. Popcorn will last for a week.

ShareThis