Showing posts with label soy-free. Show all posts

Tuesday, June 5, 2012

Oatmeal Chocolate Chip Breakfast Cookie

These (almost) raw breakfast bars are loaded with good stuff. Filled with protein and fiber and chocolate chips, it is the perfect way to start the day.

Oatmeal Chocolate Chip Breakfast Bars
yield: 12 bars
gluten-free, sugar-free, soy-free, (almost) raw

1 1/2 cups walnuts, soaked overnight, drained and rinsed
1 1/2 cups dates, pitted
1/2 tsp salt
2 cups oats
3 tbsp raisins
2 tbsp flax seeds
1/4 cup chocolate chips
1/4 cup pecans, chopped
Lightly spay an 8x8 baking dish and set aside.

Mix together dates, walnuts, and salt and in a food processor until fairly smooth (some texture is fine). Add 1/2 cup oats and blend until oats are broken up.

Remove dough from food processor and place in medium bowl. Add the rest of the oats and all remaining ingredients. Stir together until everything is well combined.

Press into the bottom of the baking dish. Let set up in refrigerator at least an hour before slicing. Store in refrigerator and enjoy as breakfast or midday snack throughout the week.
 What's your favorite breakfast food?

Monday, May 21, 2012

Hot Fudge Sundae Cake for One


This is a simple, rich, and gooey fudge cake. You can make this cake in about ten minutes and you will be glad you did! The subtle caramel flavor combines with the toasted pecans and fudgy chocolate making this one heavenly dessert.

Hot Fudge Sundae Cake for One

1/4 cup flour
1 1/2 tsp cocoa powder
pinch of salt
1/2 tsp baking powder

1/4 cup brown rice syrup
1/4 tsp vanilla
1 1/1 tsp coconut oil, melted
2 tbsp milk
2 tbsp chopped pecans (optional)

3 Tbsp brown rice syrup
1 tbsp cocoa
1/4 cup hot water

Preheat the oven to 350 degrees F.
Mix together flour, 1st cocoa powder, salt, and baking powder in a single serving ramekin or oven-proof bowl. In a small bowl combine 1st brown rice syrup, vanilla, coconut oil, and milk. Pour over dry ingredients and mix together to form a batter. Fold in chopped pecans.

Combine the remaining ingredients (brown rice syrup, cocoa powder, water) and pour over the batter. Do not stir in! Place in oven and bake for 30-40 minutes. It will be gooey, but cake will be formed on the top. Check out the picture above.

Let cool for 15 minutes. Flip the cake out of ramekin. The bottom will be full of delicious gooey fudge topping. Top with pecans, your favorite ice cream , or coconut whipped cream.

Enjoy!

Sunday, May 13, 2012

Chocolate Peppermint Mousse

sugar-free, soy-free, gluten-free

Look good? It is!
Get the recipe here at The Sweetest Vegan who graciously let me be a guest blogger on her fantastic website.

Tuesday, May 8, 2012

Raw Coconut Almond Truffles

 raw, gluten-free, soy-free, sugar-free, vegan

These super easy truffles will satisfy that late night chocolate craving without the sugar and empty calories of other desserts. And they freeze well, so make only a couple truffles and freeze the batter for later midnight chocolate craving.
Raw Coconut Almond Truffles
1 cup dates
1/2 cup walnuts
1/2 cup almonds
1/2 + 2 Tbsp cup raw cocoa powder
1/2 cup shredded unsweetened coconut 
1/4 cup maple syrup
1 tsp vanilla extract
1 tsp almond extract
1/2 tsp salt
Extra coconut, cocoa powder, or nuts for finishing

In a food processor blend together dates, walnuts, and almonds until it forms a crumble-paste. If it is too thick, add a little water, but only enough for it to come together. It shouldn't be totally smooth; some nutty pieces are desirable. Add the cocoa powder and blend until mostly incorporated. Remove the nut mixture from food processor and place in a large bowl. Fold in the remaining ingredients by hand.

Now it's time to truffle. If the "dough" is too sticky at this point, place in the freezer for 30 minutes until it rolls easily into balls. Measure the truffle mixture out with 1 heaping tablespoon each. Roll into balls and then toss in your desired topping. 
While these could be eaten right away, the truffles are best when cold. For best results place truffles in freezer and allow to harden (at least 1 hours). Store the remaining in freezer and pull out 10 minutes before serving.

What's your favorite midnight treat?

Monday, May 7, 2012

frushi (fruit sushi)

 What is better than tropical fruit and minty coconut flavors on a hot day? 
That's right, we had frushi for dinner! Typically I think of this as more of an after-dinner sweet, or summer time snack, but I had a very specific craving tonight and thus I offer you my fruit sushi.
Frushi
Gluten-free, soy-free, sugar-free, vegan

Coconut Rice
1 cups sushi rice
1 1/2 cup water
1 cup coconut milk
2 Tbsp maple syrup
1 tsp vanilla
1 pinch salt
 Prepare the sushi rice. Rinse the rice 4 or 5 times until the water runs clean. Once clear, drain water and add 1 1/2 cups cold, fresh water to rice. Allow to soak for 30 minutes. Place on stove over high heat and bring to boil. Reduce heat to simmer and cook 20 minutes.
When water has evaporated and the rice is done, turn heat up to medium and add the remaining ingredients.
Stirring often, mix until the coconut milk is soaked into the rice, about ten minutes. Spread rice onto a plate and allow to cool. 

Once rice is at room temperature, scoop the rice into heaping tablespoons and shape into squares or circles. Place back into refrigerator and let rice set up. Meanwhile thinly slice fruit.
 mango
kiwi
watermelon
pineapple
or any other fruit of your choice

Assemble frushi however your heart desires.
Once frushi is assembled refrigerate and make the coconut dipping sauce.

 Coconut Dipping Sauce
1/2 cup coconut milk (or the remaining of your can)
2 tsp maple syrup
1 tbsp finely minced mint

Mix together. Refrigerate until ready to use.

Enjoy!

 What's your favorite food on a hot (almost) summer day?

Sunday, May 6, 2012

Raw Chocolate Hazelnut Cheesecake

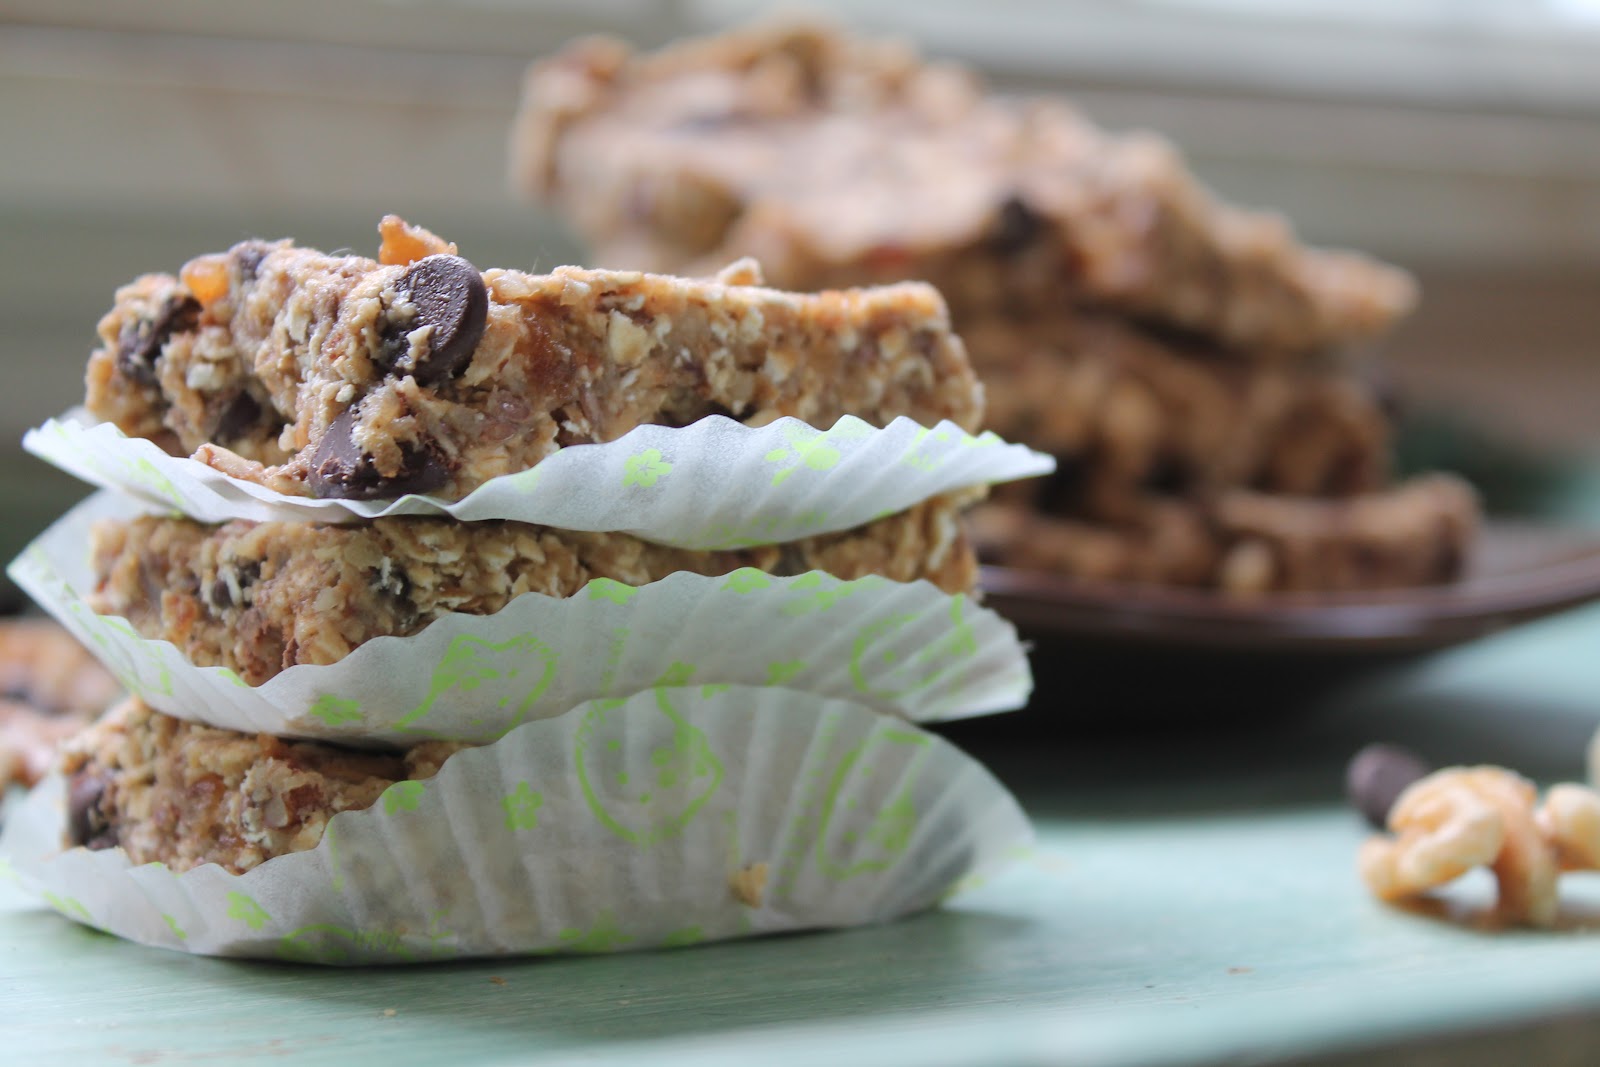
That's right friends. And it's as good as it looks.

So far the biggest benefit of my soy/gluten freedom month has been the forcing of creativity and innovation. I have to admit, I used to have a sort of prejudice against raw desserts disbelieving in their potential goodness. Oh was I wrong. This is one of my favorite desserts I have ever made. Ever. The chocolate hazelnut cheesecake is so rich and creamy and pure. But wait there's more, it's also healthy!


Raw Chocolate Hazelnut Cheesecake
gluten-free, soy-free, sugar-free, raw, vegan

Crust
1 cup hazelnut meal
1/4 cup + 2 Tbsp raw cocoa powder
3 Tbsp maple syrup
1 tsp vanilla
1 pinch sea salt

The best pan to use for this recipe would be a Flexi-pan or other type of silicone mold. Otherwise a spring form pan works great. If you're very brave and don't have a Flexi-pan but want individual cheesecakes, use a muffin pan, lightly oiled. It will take a little tlc to get the cheesecakes out, but you can do it! This recipe would fill a 9" spring form pan or about 12 individual molds.

Blend all ingredients together in a food processor until it starts to come together. Press the crust into the bottom of desired pan, about 1/4 inch thick.

Set aside while you making the filling.
 The Filling
2 cups raw cashews, soaked overnight and rinsed
1/4 cup + 2 Tbsp hazelnut butter (peanut butter works too)
1/2 cup coconut oil, melted
1/2 cup maple syrup
1/2 cup cocoa powder
1/2 cup water
1/2 tsp salt

In a food processor or mixer blend together cashews, maple syrup, water, and salt. Mix until totally smooth, scraping down the sides of the processor as necessary. Add cocoa powder, hazelnut butter and coconut oil to cashew mixture and blend all together, scraping down again, until mixture is uniformly combine.

Spoon or pipe filling on top of crusts. Stick cheesecake in the freezer until solid all the way through (at least 2 hours for individual cheesecakes, 4 for large cheesecake).
Once frozen remove cheesecake from pan. If using silicone mold, they will easily pop out. If you have a muffin tin, run a sharp, hot knife around the edges of each cheesecake, flip tin upside down and give it a few good whacks again the counter. They could start to slowly side out at this point. Be patient, gravity is on your side. If a few minutes have past and the cheesecakes are still refusing to drop, use a lighter to heat the bottom of the tin briefly; the heat will help release the cake.

Place cakes in the refrigerator and make the chocolate sauce.


 Chocolate Sauce
1/3 cup coconut oil, melted
1 tsp vanilla
1/4 cup maple syrup
1/4 cup cocoa powder

Mix ingredients together with fork. Scoop a little onto cold cheesecake. Place back in fridge and let sauce harden.

Top with hazelnuts. Serve cold


Friday, May 4, 2012

Chocolate Peanut Butter Banana Milkshake...

for breakfast? okay!

This shake is healthy enough for breakfast and good enough for dessert! Check it out!

Chocolate, Peanut Butter, and Banana Shake
Soy-Free, Gluten-Free, Sugar-Free, and Vegan
2 frozen bananas
1 cup milk (I used hazelnut milk but soy, oat, or almond would work great too)
2 Tbsp cocoa powder
1 1/2 Tbsp peanut butter
1 Tbsp brown rice syrup
Blend together in mixer or food processor until smooth.
Enjoy!

When I was pregnant I would add soy protein powder to my morning shakes for some extra nutrition. Currently I'm off soy but it would be  great addition for anyone who needs a protein boost.


Thursday, May 3, 2012

Pepperjack Cashew Cheese

Oh my my, I love cashew cheese. There are a lot of store-bought, processed vegan cheeses out there, and some of them are quite good but few are meant to be eaten without melting first. This Pepperjack recipes is inspired from The Complete Guide to Vegan Food Substitutions, which I talked about here.
This recipe makes a lot of cheese and could easily be cut in half.

Spicy Pepperjack Cashew Cheese
Soy-free, Gluten-free, Vegan
1 Tbsp agar powder
3 cups water
2 cups raw cashews, soaked
1/4 cup lemon juice
1/4 cup nutritional yeast
2 tsp sea salt
1/2 tsp onion powder
1/2 tsp garlic powder
1/2 tsp red pepper flakes
Prepare a loaf pan (9x5 or so) by lightly oiling the bottom and sides.

Blend the cashews in (ideally a Vita-mix) mixer or food processor until totally smooth. Add the lemon juice, nutritional yeast, salt, onion and garlic powders, and red pepper flakes and mix together until smooth.
Meanwhile measure 1 Tbsp of agar and mix with 3 cups of water. Bring to a full boil and then boil for five minutes, whisking often.

Pour the cashew mixture into agar/water pot and stir together until well combined and smooth. The cheese should come together at this point and clear the sides of the pot.

Immediately fill your prepared loaf pan with the cheese and smooth over the top.
Refrigerate until hard. When ready gently pull cheese away from the sides and flip it out. Cut with a serrated knife. Store in an airtight container in refrigerator for up to one week. For longer storage tightly wrap the cheese in plastic wrap several times and store in freezer.
Enjoy with crackers or fruit.

Monday, April 30, 2012

Salted Caramel Corn

 gluten-free, soy-free, vegan

12 cups popped popcorn (about 1/2 cup kernels)

1 cup packed brown sugar
1/2 cup brown rice syrup
1/3 cup non-hydrogenated margarine (I used soy free Earth Balance)
1/2 tsp salt
1/2 tsp baking soda
1 tsp vanilla

I only recently discovered how easy it is to make popcorn with just a stove and a pot. Upon this discovery my mind started racing with all the wonderful  flavors I could make. Naturally salted caramel was the first on my list.

So if you're like me and are unlearned in the ways of air popping popcorn, fear not! It's incredible fast and easy.  Place the kernels in a large pot over medium high heat with tight fitting lid. For 1/2 cup kernels, I used a 6 qt pot and it just fit. Keep the pot moving around the burner to avoid burning the kernel, hold down the lid, and wait for the kernels to pop. Remove from heat as the popping slows down, keeping the lid on for any remaining kernels to finish.


Pour the popcorn in a large bowl and set aside while making the caramel sauce.

Preheat the oven to 250 degrees F and lightly oil two baking sheets.
In a medium sized pot combine sugar, brown rice syrup, and margarine over medium heat.


Stir together and bring to a boil. Let boil for five minutes, stirring once.


Remove from heat and add baking soda, salt, and vanilla. Immediately pour over the popcorn slowly while mixing it in with the other hand. Once well combined spread out into single layer onto prepared baking sheets. Sprinkle with a couple pinches of good sea salt and bake for 45 minutes, stirring every 15 minutes. Remove from oven and stir once more. Let sit for 10 minutes and enjoy!


When completely cool store in an airtight container. Popcorn will last for a week.

Sunday, April 29, 2012

Roasted Eggplant and Tomato Pizza

gluten-free, soy-free, vegan pizza


When I removed gluten and soy from my diet I was afraid it was going to be a sad, sad month. How silly of me.This pizza is delicious, hearty, and completely satisfying.
 
Gluten-free cornmeal crust

2 1/2 cups gluten free flour (I used Bob's Red Mill Gluten-free pizza crust mix)
1/2 cup cornmeal
2 tsp sea salt
2 tsp dry yeast
1/2 tsp crushed red pepper
1 to 1 1/4 cup warm water
2 tsp olive oil

Mix together the dry ingredients in a food processor or standing mixer. When well combined slowly pour in warm water and oil until dough comes together.  Pull out dough and kneed together on a (gf) flour-covered surface.


Once the dough has formed a smooth ball, place into a lightly oiled bowl and cover for 1 to 2 hours, until dough has doubled in size.


While dough is rising, prepare the eggplant by cutting into thin slices and sprinkling with salt. This will remove some of the eggplant's bitterness while keeping the firm texture.


Pizza Toppings

1 tbsp olive oil
2-3 cloves garlic
1 package Diaya mozzarella cheese
2 tomatoes
1/4 cup basil
1/4 flat leaf parsley
1 small eggplant
1/2 white onion
salt and pepper


Preheat oven to 450 degrees F. Spread a little of cornmeal on a 12x18 in cookie sheet or pizza stone.

When pizza dough is ready shape into pan. Brush with olive oil, sprinkle with garlic and fresh herbs. Sprinkle a thin layer of Diaya cheese.. Add onions. Top with tomatoes and the rest of the fresh herbs.


Add eggplant and top with remaining Diaya cheese. Finish with black pepper.


 Bake at 450 degrees F. for 15 -18 minutes until eggplant is browned and cheese is melted.
Pull from oven and let cool.
Enjoy!


Wednesday, April 25, 2012

No Bake Chocolate Oatmeal Cookies

vegan, gluten-free, soy-free no bake cookies

For the next month I'm on a gluten-free, soy-free food challenge. As a vegan this limits my diet substantially.  After five days of incredibly healthy, mostly raw meals I needed some chocolate! I have an old no bake cookie recipe in a family cookbook that I have been veganizing for years and I realized with one quick walk to the store, I could have my chocolaty gluten and soy free dessert. 

My grocery run: Earth Balance soy free "butter". I have actually never tried this product before since I usually buy Earth Balances original "butter" sticks, but I knew this product existed and figured it would substitute fine.


And back home mere minutes later, I was ready to no-bake.

No Bake Chocolate Oatmeal Cookies

1 cup sugar
1/2 cup non-dairy milk (I used hazelnut)
1/2 cup non-hydrogenated margarine (go with Earth Balance)
1/2 cup cocoa
1 tsp vanilla extract
1 1/2 cups oats 


In a medium sized pan mix together sugar, non-dairy milk, margarine, and cocoa. Place over medium high heat and bring to boil. Boil for two minutes (not less) and remove from heat.


Mix in oats and vanilla until well combined and looks something like this:


Drop cookies onto wax paper and let cool at room temperature. Once cool and hard, peel off from wax paper and enjoy. Store in an airtight container in the fridge.


These cookies certainly satisfied my chocolate craving while keeping me honest with my food challenge.

Chocolate Strawberry Parfaits

 Strawberry Banana Parfaits
vegan and soy-free

My family gathers several times a year to celebrate clusters of birthday. This weekend we got together for three birthdays and I made the dessert. Ever since my fantastic birthday dinner at Portobello and their amazing tiramisu with cashew marscapone I had been eager to experiment more with cashews. The result: a creamy, fluffy, and very rich mousse I am extremely excited to share as part of my birthday parfait recipe.

The Components

Chocolate Brownie Cake Chocolate Mousse
Strawberries
Bananas
Coconut Whipped Cream

Chocolate Brownie Cake

This is a delicious blend between a cake and a brownie: rich, moist, and super chocolatey. This is probably the easiest cake recipe I've ever seen and takes no more than ten minutes to assemble.

1 1/4 cup flour
1 cup sugar
1 tsp baking powder
1/3 cup cocoa
1/2 tsp salt

1 cup warm water
1 tsp vanilla extract
1/3 cup canola oil
1 tsp apple cider vinegar

Preheat the oven to 350. Lightly oil a 9'' cake pan or 8x8 square dish. Mix together the first five ingredients until well combined. In a measuring cup combine the wet ingredients and pour into the dry. Mix together until smooth, but do not over-mix. Small chunks are okay; the batter should look something like this:

Place in oven and bake about 20 minutes, until knife comes out clean in the center.
Set aside to cool.

Chocolate Mousse

This recipe follows a classic chocolate mousse that is made up of three components: whipped eggs and sugar, melted chocolate, and whipped cream. After some experimenting and reading I came up with this vegan version of the classic mousse.

2 cup cashews, soaked overnight
1 cup water
1/4 cup sugar

12 oz chocolate, melted

2 cans coconut milk, chilled overnight
1/3 cup powdered sugar
2 tsp vanilla extract or 2 vanilla beans

Place cashews in a bowl and add 1 cups water.
Let the cashews soak in the water overnight.


Once ready blend the cashews, water, and sugar in a food processor for a looooong time until mixture is smooth and thick.

Meanwhile melt the chocolate on a double boiler, stirring occasionally.

Once chocolate is melted scrape into large bowl. Fold in the completely smooth cashew mixture until well combined. Let cool to room temperature.

While chocolate cashew mixture is cooling, open the two cans of chilled coconut milk and scrape out the fatty solids on the top (about half the can). Place in a bowl with sugar and vanilla extract and blend with a hand mixture until the coconut milk is the texture of whipped cream.

Fold in the whipped cream to the now cooled chocolate mixture. Place in a airtight contain and let set up in the fridge.


Coconut Whipped Cream

1 can coconut milk, chilled overnight
3 TBSP powdered sugar
1 tsp vanilla extract

Blend together as done for mousse.

Strawberries and Bananas

Slice 2 bananas and 1/2 pint strawberries.
Place strawberries in bowl and mix with two tablespoons of sugar to bring out the moisture.

To assemble parfaits:
cut one inch chunks from cooled cake and place 3-4 at the bottom of the glass.
Top with several sliced strawberries.
Cover with 3-4 TBSP mousse.
Repeat, this time with bananas.
Pipe or spoon on the whipped cream and top with a strawberry.
Serve chilled.

ShareThis